Oops, we finished this over a year ago, but I never got around to blogging. Better late than never, right?
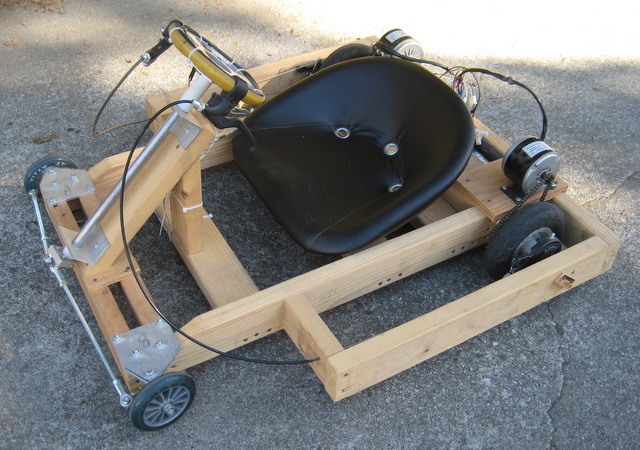
The title glosses over some details: since the last post, we added the seat, breaks, motors, batteries, and motor controllers.


To mount to motor we first assembled the chain, then pulled the motor back as far as we could and marked the hole locations. However, when actually drilling the pilot hole for the screw, I drilled the hole even further back. That way when we drove the screw in, the chain would be even further tightened. If this approach failed to tension the chain enough, my contingency plan was to add washers under the motor. Thankfully, we didn’t have to resort to this.


Next we built up the battery packs using A123 cells. We built two packs, each one 4s 6p. The packs are wired in series, which provides 24-28V to the motor controllers. We stared by hot gluing the parallel cells together.

To connect the cells we used flat braided copper wire, commonly used for shielding or as a ground strap. 3/8″ or 10mm wide is plenty for this application. Because the braid and the cells are huge heat sinks, it is essential to have a soldering iron that can provide lots of heat and has a large enough tip to spread it over a large enough area. I ended up buying something like the Weller 80L soldering iron, although I’m pretty sure mine is only 60W and not a real Weller – but it works fine for this application.


One of my favorite battery pack tricks is to heat shrink pack them with 2 liter bottles. These bottles are blow molded, so when you heat them, they shrink to return to a state of lower stress. You can think of them as balloons that were blown up and then frozen. When you heat them up, they will want to shrink down again. With some careful heat gunning, they will fit very nicely around your battery pack. and provide a semi-hard protective shell.


For the motor controllers, I bought the cheapest option when searching ebay for “250W 24V scooter motor controller”. They are basically cheap replacements for controllers on Razor scooters or ebikes. Most of these controllers have connectors for battery, motor, charger, on/off switch, brake, battery charge indicator, tail lamp, and throttle.
We only made use of battery, motor, and throttle. The on/off switch is permanently set to ‘on’ by jamming a U-shaped wire in the connector. For the throttle, we just used a normal push button. So in fact, there aren’t really multiple speeds – just on and off. This makes for a slightly choppier ride, but since usually people just want to go as fast as possible, you don’t notice it too much. Besides, variable speeds sounds like a beta model feature…

And…finally! Here’s the proof that it works:

Leave a Reply
You must be logged in to post a comment.